
With our new partnership with CheckCentral we have started automatically creating an error check for ImageManager when you create a new DR Server account, but there’s a few steps you need to take in order to start sending the email reports to CheckCentral so that they can be processed.
- Login to the control panel @ cp.servosity.com
- Click into the company you want to set up the reporting for
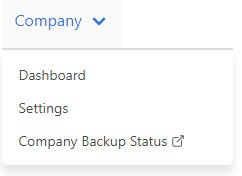
- Hover over the Company dropdown menu at the top of the screen and click Settings
- This page will display your SMTP server credentials, as well as the email address you’ll need to send the reports from
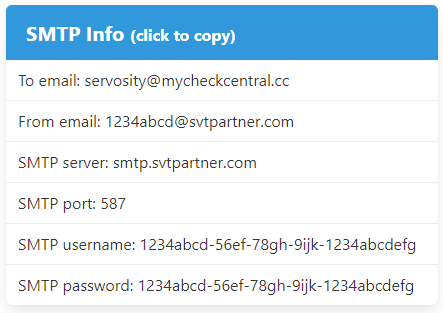
- Make note of this info, or keep this screen open as you open the ImageManager client application
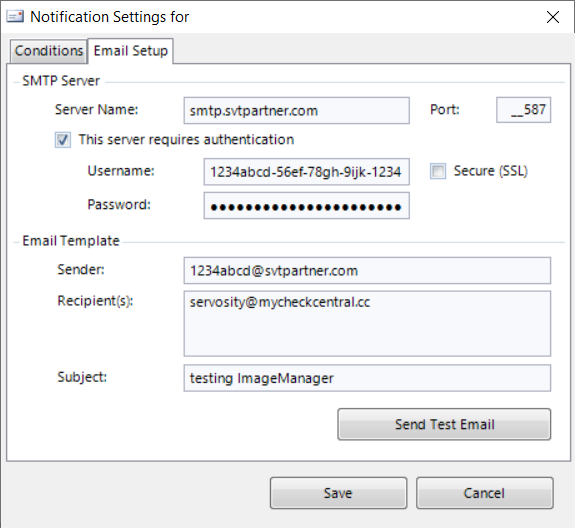
- In the Image Manager Client, click on Notification Settings in the bottom left

- Using the image below as a template, choose the following settings on the Conditions tab:
- Inactivity: 1 days
- Low Free Space: 15%
- Failures
- Warnings
- Inactivity
- Low Free Space

- Then click on the Email Setup tab and Enter the following settings:
- Hostname: smtp.svtpartner.com
- Port: 587
- Username and Password: From the SMTP info in the portal
- Sender: From the SMTP info in the portal
- Recipient: servosity@mycheckcentral.cc
- Subject: <Company Name> ImageManager
- Make sure to Click Save
ImageManager is now set to send all the relevant information to CheckCentral, where it will be processed. For more information on how to use CheckCentral to monitor your backups check out our list of articles, email support@servosity.com, or give us a call at 1-800-429-0500 and we'll be happy to help!
