- First download the Servosity Agent and install it on your machine.
Note: Its recommend to set Servosity to "Me Only" during the installation process. - After logging in, from the main panel, select "Backup Sets".

- Select "Add new backup set".

- Select File Backup in the Backup set type drop-down list.

- On the Backup Source page select the directories you would like to back up. If you would like to choose specific files or folders. Deselect the My Documents box and click on "I would like to choose the files to backup".


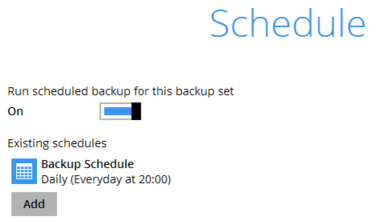
Note: If you are using ServosityPro for the DR Server / Desktop replication you only need to select the folder where your ShadowProtect images are stored. - You can either modify the existing scheduled time (default is 8:00 PM) or select "Add new schedule" in order to create a Daily, Weekly, Monthly, or Custom option.

- Choose a local or offsite destination for your replication. You can push to as many destinations as required. In addition, you can create a storage pool. This will allow you to backup data across multiple destinations.

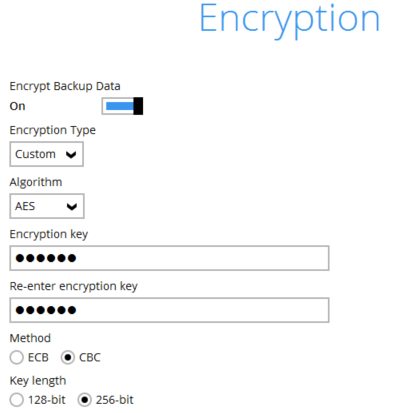
Note: If you are plan on doing a seed load only select the local seed USB drive at this point. You can follow the steps in the Seed Load Guide. - Servosity offers two types of encryption methods. When choosing "Custom" you have the ability to setup a custom encryption key or phrase. The second option is using the “Default” option which is a auto generated 44 character long encryption key.

Note: If you are backing up a folder of ShadowProtect images which have been encrypted, we recommend you turn encryption off in Servosity to improve performance.
Note: The key can be viewed by going back into "Backup Sets" from the main panel, selecting the backup set > Show advanced settings > Others > Encryption > Unmask encryption key while you are logged in with the computer user that created the backup set.
Note: You want to ensure the encryption key is stored somewhere safe as you will be unable to recover if the key is lost or forgotten.
- Enter Windows credentials for the Domain or Local Administrator account

- Select "Next" to complete the creation of the backup set. You can choose to kick the backup off now or allow it to run on its normal scheduled backup. The first backup will be the initial full and the subsequent jobs will be incrementals (just the changed data).
