
Welcome to Servosity! We're excited to be working together! If you've already been through a Kickoff Session this article will just be a reminder, but if you're brand new to Servosity Simplified, these few steps will get you positioned to start backing up your clients to our Adamantium Vault, so that you can sleep easy.
Logging in
The first step is to setup your account in the Servosity Control Panel. You should have received an email from support@servosity.com with the subject Welcome to Servosity after completing the Partner Agreement. You can use the link in that email to create your password and get logged in. If it's been more than 12 hours since you received it, you can simply use the Forgot your password? link on the sign-in page.

Once you're logged in, you'll be taken to the MFA setup page. Check out this guide if you need help to setup your MFA access. Once that's taken care of, click on the Servosity logo in the top left corner to be taken to the Partner Dashboard.
Creating Backup Accounts
Let's start by creating your first Company. Click on the green Add Company button to get started.

Type in the name of the Company you want to create backup accounts for then, click Create Simplified Company.

Now the Partner Dashboard will show you a list of created companies. You can think of these as Organization Units, or folders to contain the backup accounts for each company. So to create those backup accounts you'll click on the company name. Once you're in the company you can follow the steps in this guide to create and provision your backup account.
Step 1: Download the Servosity One Agent
- Access: Navigate to the company dashboard.
- Download: Locate and download your company-specific Servosity One Agent and our Remote Access Installer. These are found under the Downloads Dropdown. The link will include the company name and a provisioning token in the file name.

- The Servosity One Installer button will give you an .exe that is specific to this company.
- The ServosityOne PowerShell Install Script will give you a PowerShell Script that you can run in an Administrator PowerShell Window. This will download and run the ServosityOne installer onto the system.
- The Remote Access Installer will give you an .exe that is specific to this company
Important: Do not rename the downloaded files to ensure seamless provisioning.
Step 2: Installation
-
Setup: Save the downloaded agent and run the Servosity One installer on the desired machine. Make sure to Install the Remote Access Tool as well!
-
Completion: Once installed, Servosity One will be ready on your machine, specifically provisioned for your company.
Step 3: Provisioning
- Initiate Provisioning: Go to the dashboard and click the Add or Provision Account button, then select Provision Servosity One.


- Patience is Key: Provisioning may take up to five minutes to appear on the dashboard. Feel free to install agents on other machines during this wait.
Step 4: Finalizing the Setup
- Selection: Once the system appears on the dashboard, click the Provision button out to the right of it. You will repeat this for each system you are provisioning.

- Will This Computer run ImageManager: If the system you're provisioning is running ImageManager or is a dedicated BDR, select "Yes" to correctly provision it. Otherwise select "No"

- If your ImageManager system also needs to be backed up: Make sure to select "Yes" when it asks.

- Backup Account: Select whether to create a new Backup Account, or to provision this agent to an existing account.
- If it’s a new system that has never had a backup account, select 'New' to create a new backup account named after this system.
- If you're re-provisioning an existing system, or activating a replacement for an existing system, select 'Existing' and choose from the listed accounts.
- Configuration: All installed volumes are automatically selected. Deselect any as necessary, adjust retention settings, or switch the system type (e.g., from DR Server to DR Desktop).
- Notes: Add any relevant notes for further reference.

Step 5: Activation
- Activation: Hit 'Provision' to create the new backup account. It will initially appear as disconnected.
- Connection: Refresh the page after a few moments to see the status change to connected.
- Once this process is complete our team knows what to backup on this new system, and we can get started as soon as you provide remote access and credentials.
Company Credentials:
You'll need to create some credentials for us. We strongly recommend that you create a new user rather than giving us access to an existing one, so that access can be tracked separately. Either way, you'll start by selecting Credentials and Keys from the Company dropdown in the top left corner:

To access this page you'll need to put in your MFA code again, and it will timeout after 30 minutes, so keep your phone handy. The first thing to do is click the green Create Credential button in the top left corner, and then specify the device name. Please put in the actual computer name (or device name if it's a NAS), then provide the domain name (if there is one) and a username. You can use Servosity if you want it to be easy to remember, or something less obvious like Vikki. It doesn't matter at all, so long as you save it in this credentials page. Put anything else we should know about this system or credential in the Notes section, and then click Save.
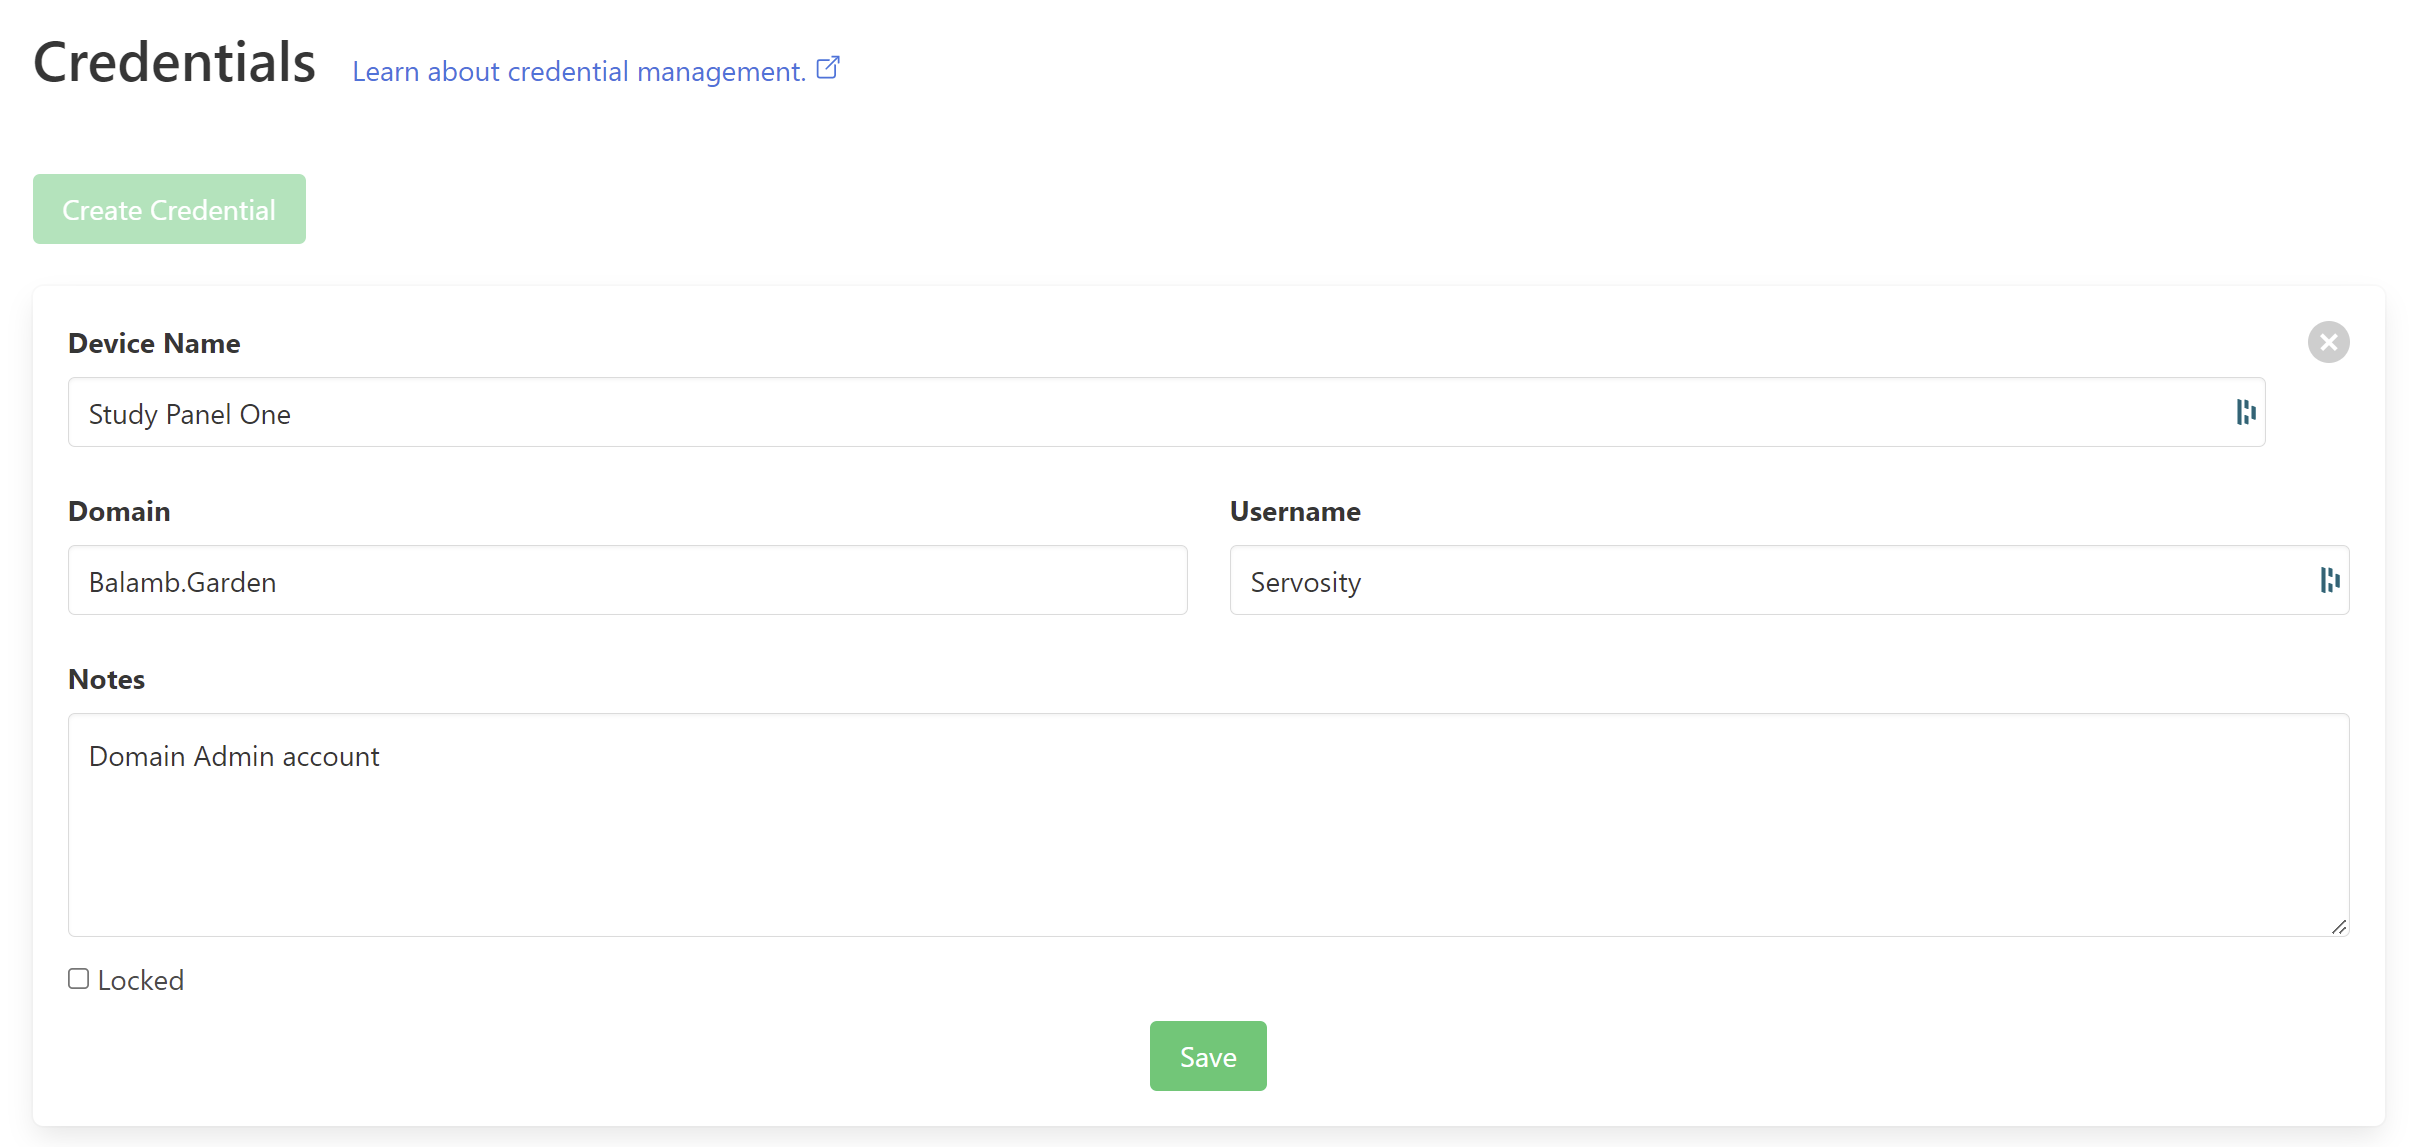
When you save the credential, we will automatically generate a password for you. You can either click the View button and copy that password to set it as the password for the account you created. If you prefer to create your own passwords, you can do so, and just click the Edit button, then replace our password with yours and click Save. Either way, please make sure the password in the credential store will allow us to login.

The last important thing is that the user will need to be a member of the Local Administrators group on any system we are managing. That is the minimum user permissions that will allow us to access the ShadowProtect SPX application in case we need to troubleshoot or make changes.
If any of the systems we are managing is a Domain Controller, there is no "Local Administrators" group. In that case you can either make it a member of the "Domain Admins" group (in which case we can use that single account to access any system on the domain), or a member of the "Administrators" group, which means we'll have admin rights on the DC only with that account.
I know you must feel like you've been drinking from the firehose at this point, but don't worry, this will all be second nature in no time. As long as the backup accounts are created, our support team will know exactly what you need and we'll be there to help you every step of the way. If you're not overwhelmed yet, you can learn a lot more by visiting our FAQs section.
If you need help with any of this, don't hesitate to email support@servosity.com or give us a call at 1-800-429-0500 and we'll be happy to assist you.
Welcome to Servosity!