
This is part 3 of a 5 part series. To see an overview of Servosity Safe DR Backups and find links to the other articles in this series, click here. Part 4 will be linked at the bottom.
Now that you've created your DR Backup Accounts it's time to install and configure ShadowProtect SPX (Click here to download the recommended version)
ShadowProtect requires a reboot before you can configure it. If you're also installing ImageManager on the same system, go ahead install both before you reboot so you only have to do it once.
If you're installing ShadowProtect on a BDR server for recovery purposes, you don't need to do anything else at this point. Follow the next steps only for systems that you want to backup.
Login to ShadowProtect SPX application with your local / domain administrator credentials without modifying any other login information.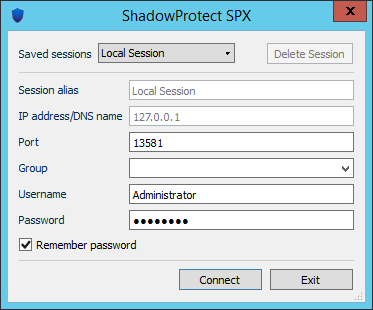
When you launch ShadowProtect for the first time, you will need to activate it with a product key if you are going to be backing up this system. The key was generated when you created the DR Backup Account in the Servosity Control Panel. You can find it by clicking on the Edit button for that DR Backup Account. Click here for more detailed instructions on finding your SPX License.
Next, click the Destinations icon (second from the left  ), then click Add and select either network share or local volume. You can name the destination whatever you want, then enter the path to your Backup Store. If you haven't created a Backup Store yet, go back to step 2. If you are using a network path you'll have to provide the Domain, User Name, and Password for a user with access to that destination.
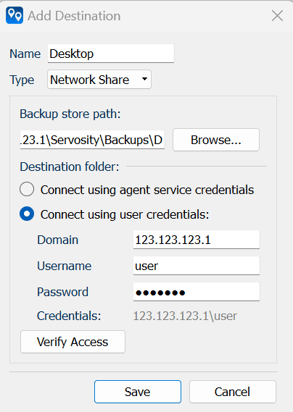
If you are using a network share with a static IP address make sure to use that IP address instead of the hostname to eliminate the possibility of DNS issues interfering with your backups.
- Click the New Job icon
 .
. 
- First you will need to set a Job name and verify the destination is correct. Leaving a comment is optional. We like to add the SPX Version number that the Backup chain was started on here.
- Select the volumes that you want to image on this machine. You can only image local disk / volumes and if the destination is a local drive, it cannot be included in the source. These should match the Volumes your selected in our Portal.
- We recommend that you use the Standard compression method as this will provide good compression without using more resources.
- Uncheck Create key file, as this option can interfere with ImageManager verification.
- You'll need to create a secure encryption key. Make sure this is stored safely because without this key your backups cannot be restored. We recommend you store these on the Credentials and Keys page for that Company in the Servosity Control Panel. You can Navigate there by clicking on Credentials & Keys in the Company Dropdown.

- Next, click the Schedule tab.

- Select "Continuous" as the Schedule Type
- Leave the Begin setting on "Immediately"
- Click on the Saturday and Sunday options to highlight them so you're backing up every day
- Set the From option to 00:05 to 23:05, so that you're backing up all throughout the day
- Set the Repeat every option to 1 hour
Following this configuration will ensure that you're getting plenty of recovery points to make sure that your clients can recover with minimal data loss in the event of a system failure.
Don't forget to Configure ShadowProtect Reporting to make sure you're getting notified in CheckCentral if there are any errors or missed backups.
I know this is a lot of steps, but once you've setup a few you'll be able to do it just a few minutes. If you run into any issues or need help with setting up the backups, please email support@servosity.com and we'll be happy to help.
The next step is Setting up ImageManager for Servosity Safe.