This is part 4 of a 5 part series. To see an overview of Servosity Safe DR Backups and find link to the other articles in this series, click here. Part 5 will be linked at the bottom.
As a rule of thumb, you'll generally install ImageManager on the machine which performs your offsite backups. ImageManager can be installed on any machine that has access to your local image chain. Because of the various jobs handled by this application, it is advised to install ImageManager on a machine which has available resources and won't be burdened by the additional tasks.
Important note: StorageCraft advises against installing ImageManager on a Domain Controller. In our experience it doesn't seem to cause any issues, however they may request ImageManager be moved to a different system if we have to escalate issues to their support team.
Follow these steps to install and configure ImageManager:
- First, install the ImageManager software from this link. ImageManager does "require" a reboot to finalize the installation process though it can usually run even without the reboot. (If you're also installing ShadowProtect SPX you can install both and reboot once)
- A popup will ask you to create a password. Please keep this password in a secure location. We recommend saving this password by creating a credential within our portal.
Note: If you are not prompted to create a password here is how you reset it: How to Reset and ImageManager Password
IMPORTANT: The path for your backup with SPX should look something like: hostname\Servosity\Backups\MachineName
If you need help setting up your Backup Store, you can check out part 2 of this series: Creating a ShadowProtect Backup Store
The following steps will guide you in continuing the ImageManager configuration while keeping these paths in mind:
- To start managing your continuous incremental chain click the folder icon in the top right corner.

- In the General tab, specify the path to the parent folder of your ShadowProtect images.
- Folder Type: Backup Store
- For a local destination: you can browse using the
 . This should be the path mentioned above: <driveletter>:\Servosity\Backups\ . Ensure you are not using the machine name designated in SPX in this path.
 - For a network path or NAS: Grab the file path where the Backups folder was created in File Explorer. Ensure you are not using the machine name designated in SPX in this path. It usually looks something like: \\x.x.x.x\*\Servosity\Backups\
- Check “This Folder Requires Authentication” if the folder or host requires a different specific username and password.
- Select “Define Specific” and enter the credentials for that NAS/Network Share
- Domain (or hostname if it's not on a domain)
- User
- Password
- In the Verification tab we recommend setting up Advanced Verification:
- Chkdsk verify (recommended)
- Screenshot Verify
- Screenshot Verification should only be enabled if ImageManager is running on a Dedicated backups system or a BDR. We don't support or recommend doing Screenshot verification directly on a Production server.
- In the Retention Tab you can configure how many hourly, daily, and weekly images you keep locally. We recommend the following settings:
- Override retention settings
- Keep Intra -daily: 7 Days
- Keep Consolidated daily: 15 Days
- Keep Consolidated weekly: 90 Days
- Uncheck Cleanup consolidated monthly image files
- Uncheck Move all consolidated image files to a subdirectory instead of deleting them
- Select Save
- Override retention settings
You will be prompted to input the encryption key so that ImageManager can verify and consolidate the images. If you used the same encryption key for all the SPX backups you created, you can put it in here. Otherwise follow the steps below.
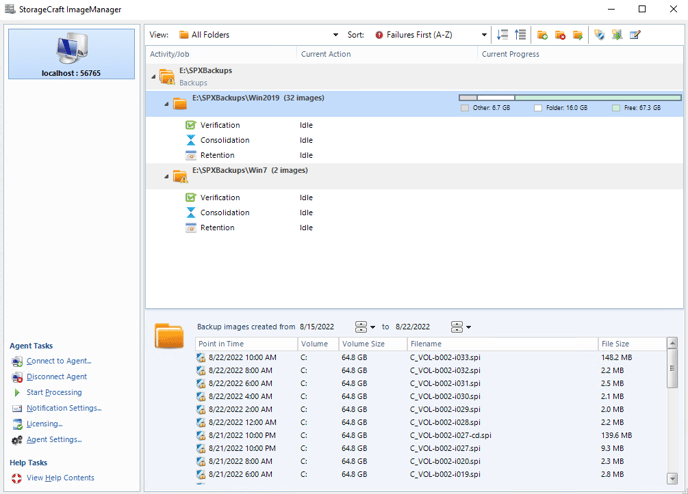
Once you hit Save, you'll see the managed folders listed.

If you followed our best practices and used different encryption keys for each backup, you'll need to right-click on each folder, and input the encryption key for the backup job being saved in that folder.
Don't forget to Configure ImageManager Reporting to make sure you're getting notified in CheckCentral if there are any issues or errors.
If you run into any issues or have questions about setting up the image management, please email support@servosity.com and we'll be happy to help.
The next step is Setting up Servosity One for DR Backups.
